
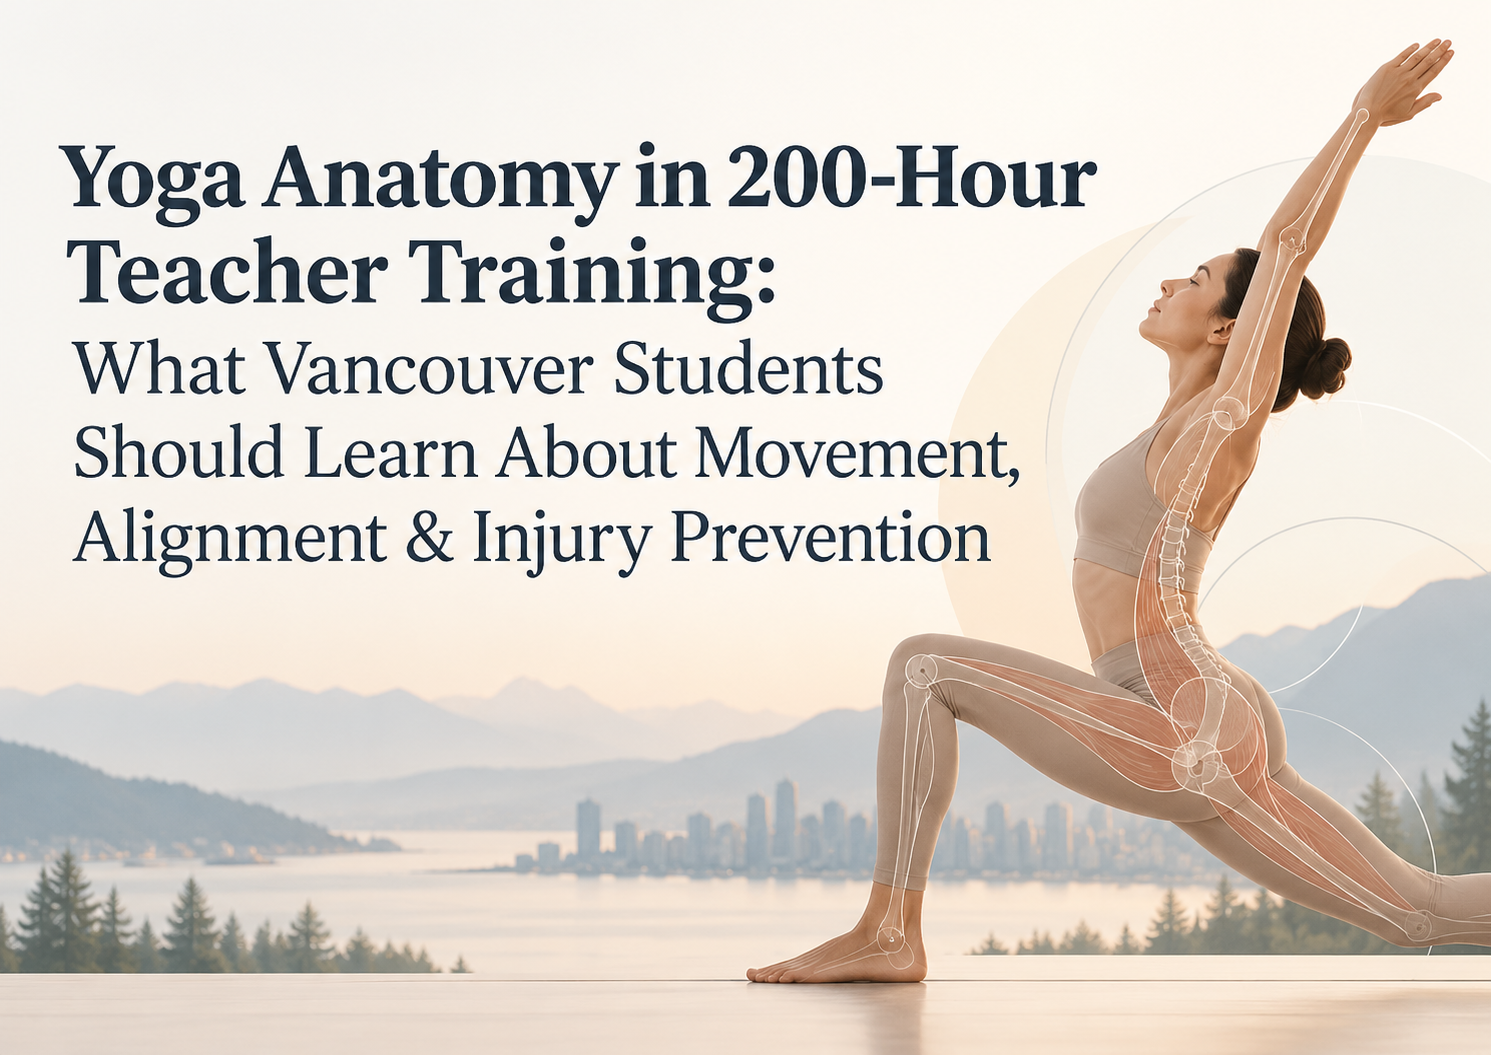
 Yoga Anatomy in 200-Hour Teacher Training: What Vancouver Students Should Learn About Movement, Alignment & Injury Prevention
You can learn a lot about yoga by doing it. You learn more when you understand why the body moves the way it does. That is the job of anatomy in teacher training.
This guide covers Yoga Anatomy in 200-Hour Teacher Training: What Vancouver Students Should Learn About Movement, Alignment & Injury Prevention. It explains what a strong anatomy curriculum includes, how to think about alignment, and how to protect your future students. It also shows you how to judge whether a program teaches anatomy well.
Vancouver students face a particular mix of bodies. Many people here hike the North Shore, run the Seawall, cycle, and climb. Many also sit at desks for hours. Each habit shapes how a body moves on the mat. A good teacher notices these patterns and adapts.
Anatomy is also a core part of professional training. Yoga Alliance, the largest international yoga credentialing body, lists anatomy and physiology as a defined educational category in its 200-hour standards. Reputable schools build their programs around it.
This post does not replace medical advice. It is a map of what you should expect to learn, and why each topic matters.
Why Anatomy Matters for Yoga Teachers
Anatomy gives you a shared language for movement. It also gives you a way to make decisions. Without it, you repeat cues you once heard. With it, you can explain what a pose asks of the body and adjust it when a student struggles.
Consider a simple forward fold. A student bends forward and feels a pull behind the knees. Another student feels it in the low back. A third feels almost nothing. Each experience has a different cause. The first may have tight hamstrings. The second may have a pelvis that tilts poorly. The third may have a naturally flexible body that reaches its limit elsewhere. A teacher who understands anatomy can tell these cases apart.
Anatomy also builds trust. Students come to yoga with old injuries, desk-related pain, and fears about getting hurt. They notice when a teacher speaks with confidence and care. Clear, accurate explanations help them relax and practise with awareness.
Finally, anatomy protects you. Teaching is physical work. You demonstrate poses, assist, and carry your own training load. Knowing how joints and muscles work helps you protect your own body across a long career.
The National Center for Complementary and Integrative Health notes that yoga is generally considered low risk when people practise with proper guidance. The key phrase is proper guidance. That guidance comes from teachers who understand the body.
Anatomy should not feel like a memory test. Yes, you will learn names. But the goal is to use that knowledge in a room full of real people. A good program keeps linking each concept to a pose, a cue, or a teaching decision.
The Foundations: Bones, Joints, Muscles, and Connective Tissue
Every anatomy module should begin with a few core ideas. These ideas support everything that follows.
Bones give the body its structure. They act as levers. Muscles pull on them to create movement. Bones also differ from person to person, which matters more than most beginners expect.
Joints are where bones meet. Different joints allow different motion. The hip and shoulder are ball-and-socket joints. They move in many directions. The knee and elbow work mostly like hinges. The spine has many small joints that add up to large movement. When you know a joint’s design, you know what it can and cannot do safely.
Muscles produce movement by contracting. They also work in pairs. When one muscle shortens, its opposite lengthens. Students should learn the terms agonist and antagonist, and how they apply to poses. For example, the quadriceps work as the hamstrings stretch in a standing forward fold.
Connective tissue includes tendons, ligaments, and fascia. Tendons attach muscle to bone. Ligaments connect bone to bone and stabilize joints. Fascia wraps and links muscle and other structures. Ligaments heal slowly and do not stretch back easily. This is a vital point for yoga teachers. Pushing a joint deeper by hanging on its ligaments does not build healthy range of motion.
Students should also understand a few movement terms. These include flexion, extension, abduction, adduction, and rotation. Teachers use these words to describe what is happening in a pose. Clear terms make cues more precise.
A strong foundation also covers how the nervous system shapes flexibility. Often, a stretch ends because the nervous system signals “stop,” not because tissue has reached its limit. Research on stretching suggests that regular practice raises a person’s tolerance to stretch. That helps explain why range of motion can improve without major changes in the muscle itself.
When these basics are solid, the rest of the course makes more sense.
 The Spine: Movement, Support, and Common Risks
The spine is central to nearly every yoga class. It bends forward, bends back, twists, and tilts sideways. Teachers need to understand how each region behaves.
The spine has four main regions. The cervical spine forms the neck. The thoracic spine sits in the upper and mid back and connects to the ribs. The lumbar spine forms the low back. The sacrum and coccyx form the base. Each region has a different job. The thoracic spine rotates well, but the ribs limit its flexion and extension. The lumbar spine bends forward and back well but twists very little. The cervical spine moves widely and needs careful treatment.
This matters in twists. Many students twist from the low back because the thoracic spine feels stuck. A teacher who knows the lumbar spine has limited rotation can cue the movement to start higher up, around the mid back and ribs. That is a small change with a big effect on comfort.
Students also need to understand spinal curves. The spine has natural curves, and they help absorb load. Teachers often use the phrase “neutral spine.” A useful definition is the position where the natural curves are present and the spine feels supported. It is not a rigid, perfectly straight line. Different bodies find neutral in different places.
Forward folds and backbends deserve special attention. In forward folds, a rounded low back is not automatically unsafe. The concern is repeated, loaded flexion with poor control, especially for people with certain back conditions. In backbends, many students crunch into the low back instead of sharing the movement across the spine, hips, and shoulders. A teacher can encourage length through the front of the body and active support from the legs and core.
The neck needs extra care. Poses that put weight on the head or neck, such as headstand, and poses that load the neck in flexion, such as shoulderstand, carry more risk. Many modern programs teach these as optional, advanced, or with modifications. A good anatomy module helps you understand why.
Finally, students should learn when to refer out. Teachers do not diagnose. If a student describes radiating pain, numbness, or weakness, the right response is to suggest they see a physician or physiotherapist.
The Hips and Pelvis: Why Every Body Looks Different
The hips are where many yoga teachers first learn that bodies vary. This is one of the most valuable lessons in the whole course.
The hip joint is a ball-and-socket joint. The ball is the head of the thigh bone. The socket is part of the pelvis. Both parts differ in shape and angle from person to person. The depth of the socket, the angle of the femoral neck, and the rotation of the thigh bone all vary. These differences affect how far someone can rotate, bend, or open the legs.
This explains why two students in the same pose can look completely different. One student sits in a deep lotus. Another cannot get close, no matter how long they stretch. The difference may come from bone shape, not effort or tight muscles. When bone meets bone, the movement stops. No amount of stretching changes that.
Teachers who miss this point may push students toward a shape their body cannot safely reach. The pressure may land on the knee or the low back instead of the hip. Good anatomy training teaches you to offer options, props, and variations without judgment.
Students should also learn the major hip muscles. The hip flexors, including the iliopsoas, often become short in people who sit for long periods. The gluteal muscles extend and rotate the hip and stabilize the pelvis. The hamstrings attach to the sit bones and cross the knee. The adductors run along the inner thigh. The deep external rotators sit behind the hip joint.
Pelvic position links the hips to the spine. When the pelvis tilts forward or backward, the low back responds. In a seated forward fold, tight hamstrings can pull the pelvis backward and round the lower spine. Sitting on a folded blanket can tilt the pelvis forward and make the pose more comfortable.
Students should also hear about femoroacetabular impingement, in which the shape of the hip bones limits motion and can cause pain. A teacher cannot diagnose it. But a teacher who recognizes pinching at the front of the hip can offer a different option and suggest the student seek professional advice.
Shoulders, Wrists, and Weight-Bearing on the Hands
Yoga puts weight on the arms more than many people realize. Downward dog, plank, chaturanga, and arm balances all load the shoulders and wrists. Repetition adds up, especially in vinyasa-style classes.
The shoulder is the most mobile joint in the body. That mobility comes at a cost. The joint relies heavily on muscles for stability. The rotator cuff has four muscles: the supraspinatus, infraspinatus, teres minor, and subscapularis. Together they hold the head of the upper arm bone in its shallow socket.
Students should also learn about the shoulder blade, or scapula. It glides along the rib cage and works with the upper arm bone every time you lift your arm overhead. Muscles such as the serratus anterior and trapezius guide this motion. In downward dog, a student who lets the shoulder blades collapse may feel pinching at the top of the shoulder. A cue that encourages the shoulder blades to spread and rotate upward can help, but only when it matches what that student’s body needs.
Chaturanga is a frequent source of strain. Dropping the shoulders below elbow height, or letting them roll forward, places stress on the front of the shoulder. Many teachers now offer a lowered-knees version, or they allow students to skip it and lower all the way to the floor. A teacher who understands the shoulder can explain these choices clearly.
The wrists deserve equal attention. The wrist is a complex joint made of many small bones. In a plank or downward dog, the wrist bends backward under load. Students with limited wrist extension, past injuries, or weak forearms may feel pain. Spreading the fingers, pressing through the whole hand, and using forearm variations can spread the load. Props such as wedges also help some students.
Teachers also need to ask a bigger question: does every student need to bear weight on their hands in every class? Often the answer is no. Offering alternatives, such as dolphin pose or a standing variation, keeps classes accessible.
Knees and Feet: The Often-Overlooked Foundation
Knee pain is among the most common complaints in yoga. Many cases are preventable. Teachers should understand why.
The knee is a hinge joint. It bends and straightens well, and it rotates only a little. When a student twists the knee while the foot stays planted, trouble can follow. This happens in poses such as lotus, half lotus, and some seated twists. The knee is caught between a stiff hip and a fixed foot. If the hip cannot rotate enough, the rotation travels down into the knee.
A key principle is to find motion at the hip first. If a student cannot sit comfortably in a cross-legged position, the answer is to raise the hips on a bolster or block, not to force the knee. In poses such as warrior two, teachers often cue the front knee to track over the middle of the foot. This keeps the knee from collapsing inward or swinging outward under load.
Hyperextension is another concern. Some students lock their knees back when they stand or fold. This is common among flexible people. Over time, it can stress the back of the knee. A teacher can offer a soft bend or encourage gentle muscular engagement.
The feet shape everything above them. The foot has arches, many small bones, and numerous muscles. Students should learn how the foot distributes weight, and how foot position can change knee and hip alignment. In Vancouver, where many people wear supportive footwear on wet streets and trails, bare-foot practice can feel unfamiliar. Strengthening and mobilizing the feet is a useful part of a yoga practice.
Students should also learn to balance. Balance poses train proprioception, which is the body’s sense of its position in space. A good teacher builds this skill gradually and offers wall support when needed.
Rethinking Alignment: Principles Over Rigid Rules
For decades, many yoga classes taught a single “correct” shape for each pose. Modern anatomy education challenges that approach.
A more useful view treats alignment as a set of principles. These principles aim to distribute load sensibly, protect joints, and help the student feel stable. The exact shape of the pose can then vary.
Here are some questions that guide this approach. Is the student’s breathing smooth? Can they hold the pose without pain? Does the weight spread through the body in a balanced way? Are the joints working within comfortable ranges? If the answers are yes, the pose is probably working for that student, even if it does not match a photo.
This approach connects directly to the hip lesson above. Bone structure differs, so shapes differ. A teacher who insists on one look is ignoring human variation.
Students should also learn the limits of the word “should.” Cues such as “square your hips” or “tuck your tailbone” work for some students and not others. Teachers can explain the intent behind the cue and offer different ways to reach it. This invites students to explore instead of obey.
Some alignment cues are well supported. Stacking the knee over the ankle in a lunge is one example. Others have less evidence than their popularity suggests. Good teacher trainers separate these cases and invite students to question what they hear. That kind of honesty builds credibility.
Alignment also includes how you speak. Short, clear, positive cues work well. “Press into your big toe mound” is easier to follow than a long explanation. Use plain language. Avoid saying a student is “wrong.” Instead, describe options.
 Injury Prevention: Practical Habits for Teachers
Injury prevention is not about eliminating risk. Movement always carries some risk. The goal is to reduce avoidable harm and help students make informed choices.
Start with sequencing. Classes should warm up the body before asking for deep ranges. Gentle movement for the spine, hips, and shoulders prepares the joints. Peak poses should follow a logical build-up. After deep backbends, a counter-pose or neutral posture helps the spine settle.
Next, offer options. Every pose should have an easier version and, when it makes sense, a more challenging one. Props such as blocks, straps, and bolsters make poses accessible. Teachers should frame props as tools for everyone, not as a sign of weakness.
Then teach students to listen. A useful distinction is between sensation and pain. Stretching sensations are usually broad, dull, and ease with time. Warning signs include sharp pain, pinching in a joint, tingling, numbness, or pain that lingers after class. Teachers should explain this difference early and repeat it often.
Teachers should also encourage students to move slowly. Many injuries happen when people rush into or out of a pose. Clear transitions and calm pacing reduce this risk.
Hands-on assists need careful thought. Always ask for consent, ideally before class. Never push a student into a stretch. Support and guide instead. Many programs now teach verbal and prop-based alternatives first.
Finally, understand your scope. Yoga teachers are not physiotherapists or physicians. If a student reports an injury, you can ask what feels comfortable and offer modifications. You should not diagnose or promise a cure. In British Columbia, regulated health professionals such as registered physiotherapists can assess injuries. The Physiotherapy Association of BC is one place to start when you need to understand what physiotherapy involves.
Teachers should also protect their own bodies. Warm up before you demonstrate. Rest when you need to. Avoid demonstrating deep poses repeatedly in one class. A sustainable teaching career depends on it.
Hypermobility, Pregnancy, and Other Special Considerations
Not every student fits the “tight and stiff” stereotype. Many yoga students are naturally flexible. Some have joint hypermobility, meaning joints move beyond the typical range.
Hypermobile students can look impressive in a pose. Their ligaments allow deep positions. But those positions may not be stable. These students often benefit from strength work and controlled movement, not deeper stretching. They may need to stay out of end range in the elbows, knees, and shoulders. The Ehlers-Danlos Society offers information on hypermobility spectrum disorders and hypermobile Ehlers-Danlos syndrome, which teachers can read to understand how these conditions affect movement.
Teacher trainees should learn to spot signs of hypermobility, such as locked-back knees or elbows that bend backward. They should then learn how to cue muscular engagement instead of “sinking” into joints.
Pregnancy is another area where anatomy matters. Hormonal changes affect ligament laxity. The center of gravity shifts. Blood pressure and breathing change. A teacher working with pregnant students needs specialized knowledge. A 200-hour program usually introduces the basics and encourages further study. It should also teach you to recommend that pregnant students check with their care provider.
Older adults, people with osteoporosis, and students with high blood pressure or past surgeries also need thoughtful modifications. For example, people with low bone density often need to avoid loaded spinal flexion and strong twisting. Teachers should know the general guidelines and when to ask students to consult their health provider.
Mental health and trauma awareness also belong in modern training. They are not anatomy topics in the strict sense, but they affect how students experience their bodies. Using invitational language and offering choice supports everyone.
Finally, remember that bodies change. A student who struggled last month may have a good day today. Ongoing, respectful observation is part of good teaching.
What a Good Anatomy Curriculum Looks Like in Vancouver
Vancouver has many teacher training options. Anatomy teaching quality varies. You can ask simple questions to judge a program.
First, who teaches anatomy? Look for instructors with relevant study or experience. This could include a physiotherapist, kinesiologist, or a senior yoga teacher with advanced anatomy training. Ask about their background. Transparency is a good sign.
Second, how much time does the program give anatomy? Yoga Alliance’s standards include an anatomy and physiology category within the 200 hours. Check how the school splits its time, and whether anatomy shows up only in a few lectures or throughout the course.
Third, is the learning practical? Anatomy should appear in asana labs, teaching practice, and feedback sessions. You should practise cueing real poses, observing different bodies, and offering modifications. Memorizing muscle names alone is not enough.
Fourth, does the program address variation and injury? Look for sessions on hips, spine, shoulders, hypermobility, and common injuries. Also look for clear guidance on teacher scope of practice.
Fifth, does the school welcome questions? A good teacher trainer says “I don’t know” when appropriate and points you to reliable sources. They avoid exaggerated health claims about yoga.
Sixth, does the program use credible resources? Textbooks, peer-reviewed research, and guidance from public health bodies are good signs. The Canadian Society for Exercise Physiology publishes physical activity guidelines that help teachers place yoga within a broader picture of healthy movement.
Finally, consider group size. Smaller groups often allow more individual feedback. That matters when you are learning to see and assist real bodies.
At Yoga Teacher Vancouver, anatomy is part of the broader foundation that shapes how teachers move, cue, and care for students. Whatever program you choose, ask to see the syllabus and talk with graduates if you can.
How to Keep Learning After Your 200 Hours
A 200-hour course is a starting point. Anatomy is a lifelong study. The best teachers keep learning.
Observe often. Watch students move in your classes. Notice how their bodies differ. Ask yourself why one student finds a pose easy and another struggles. Over time, this builds a practical eye.
Practise yourself. Your own body is your first teacher. Try poses in different ways. Notice what changes when you shift your foot position or breathe differently. Self-study builds empathy and clarity.
Take further courses. Workshops on hip anatomy, shoulder mechanics, or yoga for specific conditions can deepen your skills. Many teachers later pursue 300-hour programs or other trainings.
Read from trusted sources. Look for well-reviewed anatomy texts and research summaries from credible organizations. Be cautious with claims that sound too good to be true. Yoga does not cure every condition. Honest, measured statements build trust.
Finally, build a network. Connect with physiotherapists, massage therapists, and other movement professionals. A good referral relationship helps your students, and it helps you stay within your scope.
Conclusion: Anatomy Makes You a Safer, Clearer Teacher
This guide has explored Yoga Anatomy in 200-Hour Teacher Training: What Vancouver Students Should Learn About Movement, Alignment & Injury Prevention. The main takeaway is simple: anatomy knowledge helps you teach with confidence, adapt to individual bodies, and reduce avoidable injury.
A strong curriculum covers the foundations of bones, joints, muscles, and connective tissue. It explains how the spine, hips, shoulders, wrists, knees, and feet work in real poses. It treats alignment as a set of flexible principles, not a rigid template. It also teaches you to recognize variation, respect your scope, and refer students to health professionals when needed.
Most of all, anatomy turns you from someone who repeats cues into someone who understands them. That understanding helps your students feel safe and supported, and it helps you teach for many years.
If you are ready to become a yoga teacher, explore our 200-hour yoga teacher training in Vancouver. Visit Yoga Teacher Vancouver to learn how we teach anatomy, alignment, and safe practice. If you want to check any program’s standards first, you can also review the requirements at Yoga Alliance.